Since writing my previous blog post, I have tried baking diabetic-friendly strawberry cupcakes twice more, and both times I was not satisfied with the result. Thus, I decided that it would be wise to take a breather before getting too frustrated with myself, and changed to a different bake.
I switched to attempting diabetic-blueberry muffins instead, and I have to say that I am pleased with the result – the muffins are light, fluffy and bouncy – which has restored my faith in my ability to tackle this challenge of adapting my normal recipes to diabetic-friendly recipes. To achieve this successful bake I haven’t had to make a great deal of changes to my usual blueberry muffin recipe; slightly lower oven temperature for a slightly longer time, and I swapped caster sugar for a sugar substitute, but kept everything else the same. Great to tuck into on a furloughed-tea break!
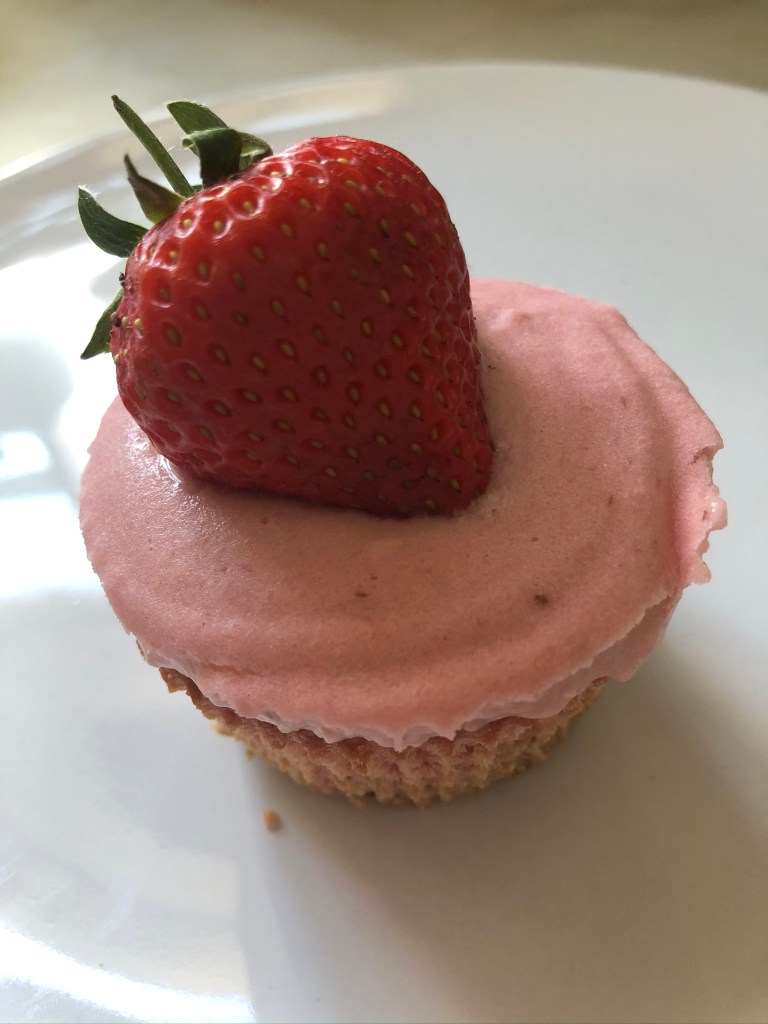
“If at first you don’t succeed, try, try and try again” is how the motto goes I believe, and I am nothing if not determined. Thus I am at the second of the three tries for the diabetic-friendly strawberry cupcake!
I adapted the recipe slightly, decreasing the ratio of wet:dry ingredients and increasing the bake time, as I think that both the batter being too wet and the opening of the oven door too early were contributing factors to the sinking cupcakes of the first attempt. I also tried improving my icing recipe by incorporating a homemade strawberry puree, having made the puree using a sugar-substitute. The result was a cake with no sinking/sloppy middle, but I think I may have gone a bit too far the other way because the texture has become very close, rather than fluffy, which is what you are aiming for in a decent cupcake. Additionally, the icing, whilst tasty, was a little too runny to pipe properly because I added too much puree.
Thus, I shall progress on to try number three; slightly increasing the wet ingredients again but not so much as I used in try number one, and I will also alter the ratio of puree to sugar-substitute icing sugar in the cream cheese icing. I have high hopes for the third attempt!
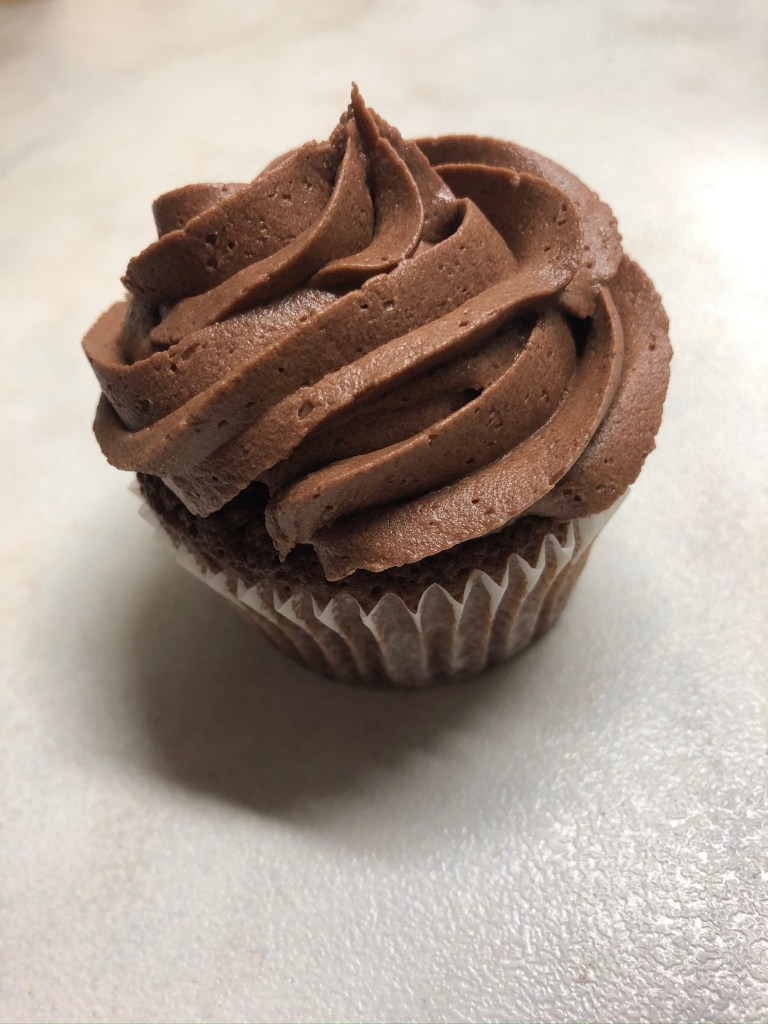
My diabetic-friendly baking has been put on the back-burner a little bit recently, as I have been working on perfecting my full-sugar macaron recipe. However, today I am back to my first-love; diabetic-friendly baking. I’ve tried adapting my strawberry cupcake recipe to be more diabetic-friendly, to mixed success. Previous experience has taught me that my diabetic-cakes need a cooler over temperature and thus a longer bake time, so I dutifully put the oven on a lower temperature, but forgot to increase the time accordingly. So I opened the oven when my timer went off, and watched in dismay as my cakes sadly deflated… very disappointing! However, I still iced them, because I think that my diabetic-friendly icing is improving everytime I make it; practice makes perfect as they say. The result? A not very impressive looking, but still tasty, diabetic-friendly, summery, strawberry cupcake. Perfect for a summers evening, as long as you don’t look at it too closely as you eat it!
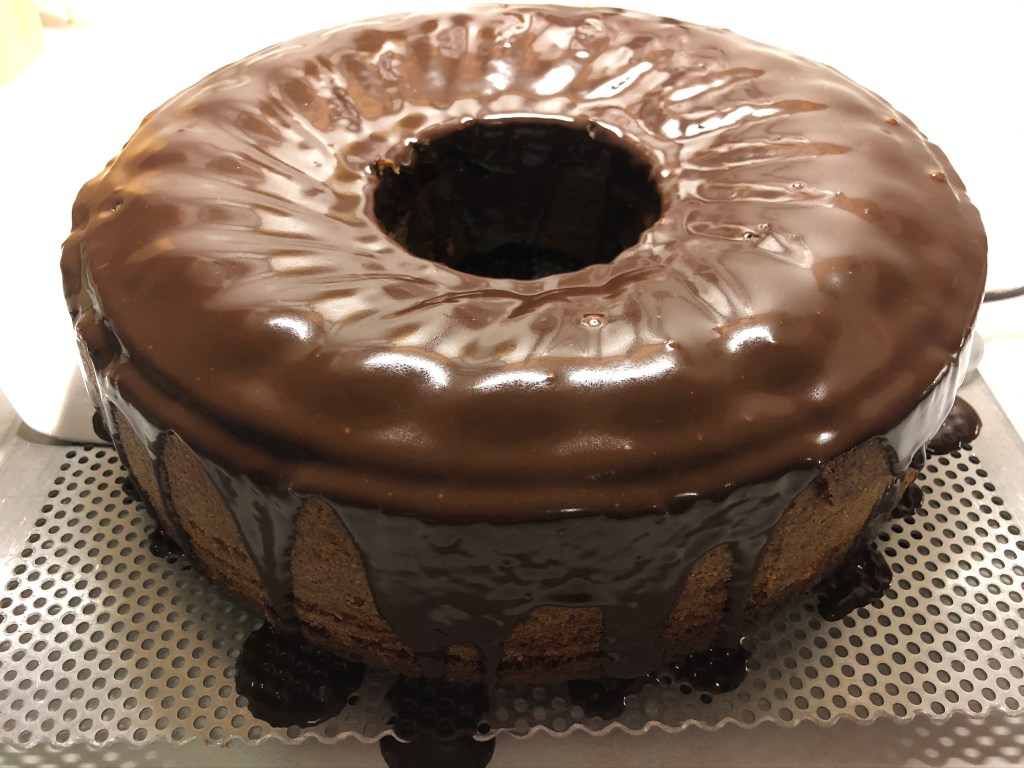
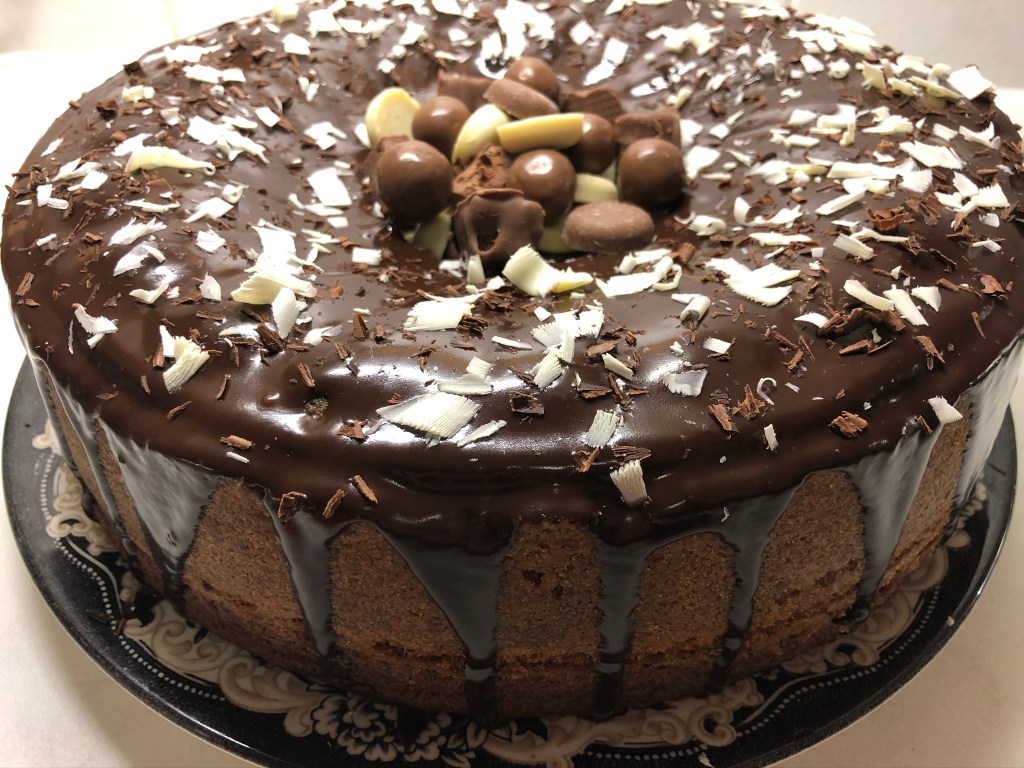
My good friends, and next-door neighbours, Anna and Tom, know that I am a keen amateur baker as they are often the guinea pigs who are brave enough to first sample my bakes! It is Tom’s birthday today (happy birthday Tom!) and Anna asked me to make him a birthday cake to help celebrate. Her specifications were that he likes coffee and chocolate, so I decided to make a coffee sponge decorated with various forms of chocolates. I used a ring mould for the coffee sponge, which I made using a standard sponge cake mixture spiked with home-made coffee essence. Once baked and cooled, I glazed it with a 70% dark chocolate ganache, allowing it to drizzle naturally over the sides. Once the ganache had set slightly, I transferred the cake over onto Anna’s gorgeous vintage-inspired presentation plate, and then had fun with the decorations – I used a block of dark and then white chocolate, and a cheese grater, to cover the ganache with chocolate shavings. Then I filled the centre of the ring with layers of maltesers, chunks of twirl, and milky-bar mixups, to achieve a pleasing visual contrast between the different white, milk and dark chocolate elements of the cake.
Today I’ve been doing some reading about glycaemic index (GI) and glycaemic load (GL), and I thought it would be nice to share my findings with you all. When you are first catapulted into the world of diabetes, the term GI is mentioned a lot, and my aim was to better understand what GI actually is, and how it relates to glycaemic load of a meal/dish/cupcake…
Glycaemic index (GI) is a measure of how quickly a carbohydrate is digested and absorbed by the body, and thus how quickly it has an effect on blood sugar levels. For those who are interested in the history of the measure, it was coined in 1981 by a scientist named DJ Jenkins (if anyone wants any further info on this, please leave a message and I will be happy to direct you). GI is recorded as a score from 0-100, versus pure glucose which has a score of 100. Anything with a GI of 0-55 is considered “low”, whereas above 70 is considered “high”. However, looking at the GI score in isolation is not very informative, as, intuitively, blood sugar level is effected not only by the rate at which a consumed carbohydrate is digested/absorbed by the body, but also by the amount of that carbohydrate that you eat. What I mean by this is we know that glucose has a GI of 100, but to calculate what effect eating the glucose has on blood sugar levels is important to take into account whether you have eaten 1g, 10g or 100g of the glucose. This is where glycaemic load (GL) comes into play.
To calculate the glycaemic load of a meal, you use this formulae: GL = GI x carbohydrate / 100. This gives you a numerical score again, but this time the parameters are shifted for what is considered low, medium and high GL; a low GL is a meal with a score of 0-10, and a high score is >20. Bearing this is mind, I’ve been calculating the GL of a few of my diabetic-adapted recipes, and have found for example that my “normal” banana chocolate cupcake recipe has a GL of 23.8, whereas my diabetes-adapted recipe has a drastically reduced GL of 9.7. What does this mean in a practical sense? Well it means that you will not get such a sharp blood sugar spike after eating the diabetic-friendly version of the cupcake; to coin a topically-relevant term being thrown around a lot at the moment it has “flattened the curve”!
For anyone who is interested in further reading around the topic, I found that the diabetes.org.uk webpage on the topic is a good place to start and includes some useful example illustrative scenarios https://www.diabetes.co.uk/diet/glycemic-load.html. And because I am a scientist by training, for those more scientifically minded there is a huge wealth of literature available on the topic, but I found table 2 within this publication particularly enlightening in terms of illustration: (N.Mcclenaghan 2006, Nutrition Research Reviews, Determining the relationship between dietary carbohydrate intake and insulin resistance).
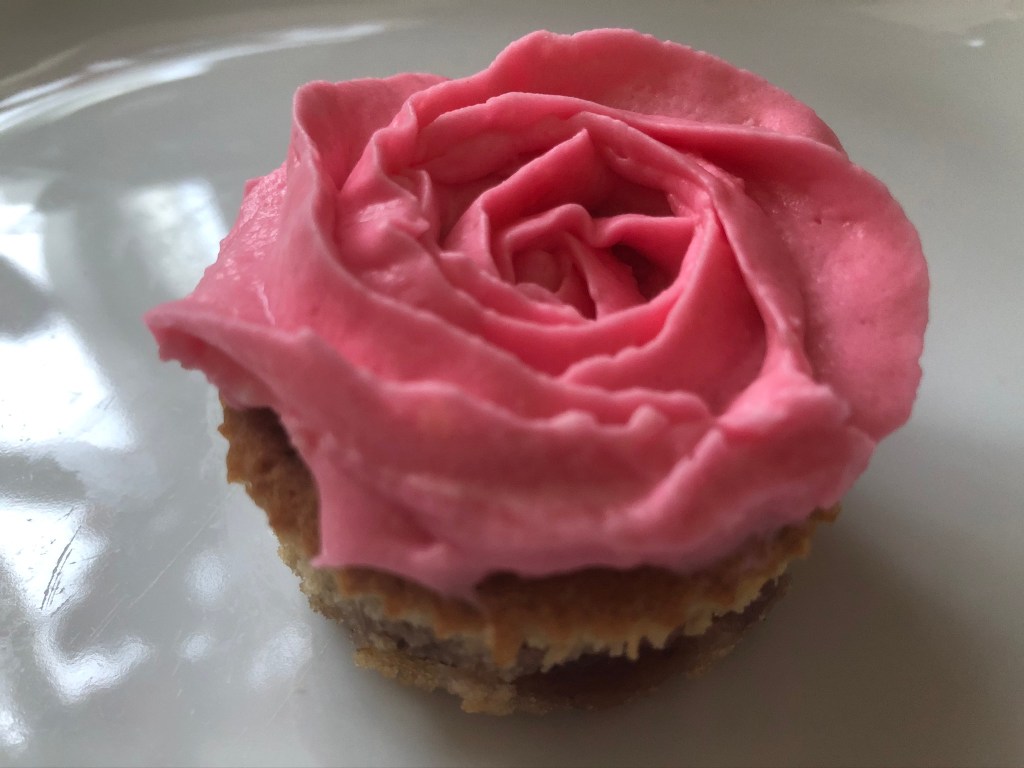
I’m very happy this evening because I’ve finally had a break-through with some successful diabetic-friendly icing! Previously, all diabetic icing that I’ve made has been a little on the grainy/dry side, and thus rather difficult to pipe into anything pretty. However, the batches I made today of both chocolate and vanilla buttercream icing were smooth and creamy, and easy to pipe with the 2D and 1M nozzle, hooray! Perseverance is always key.
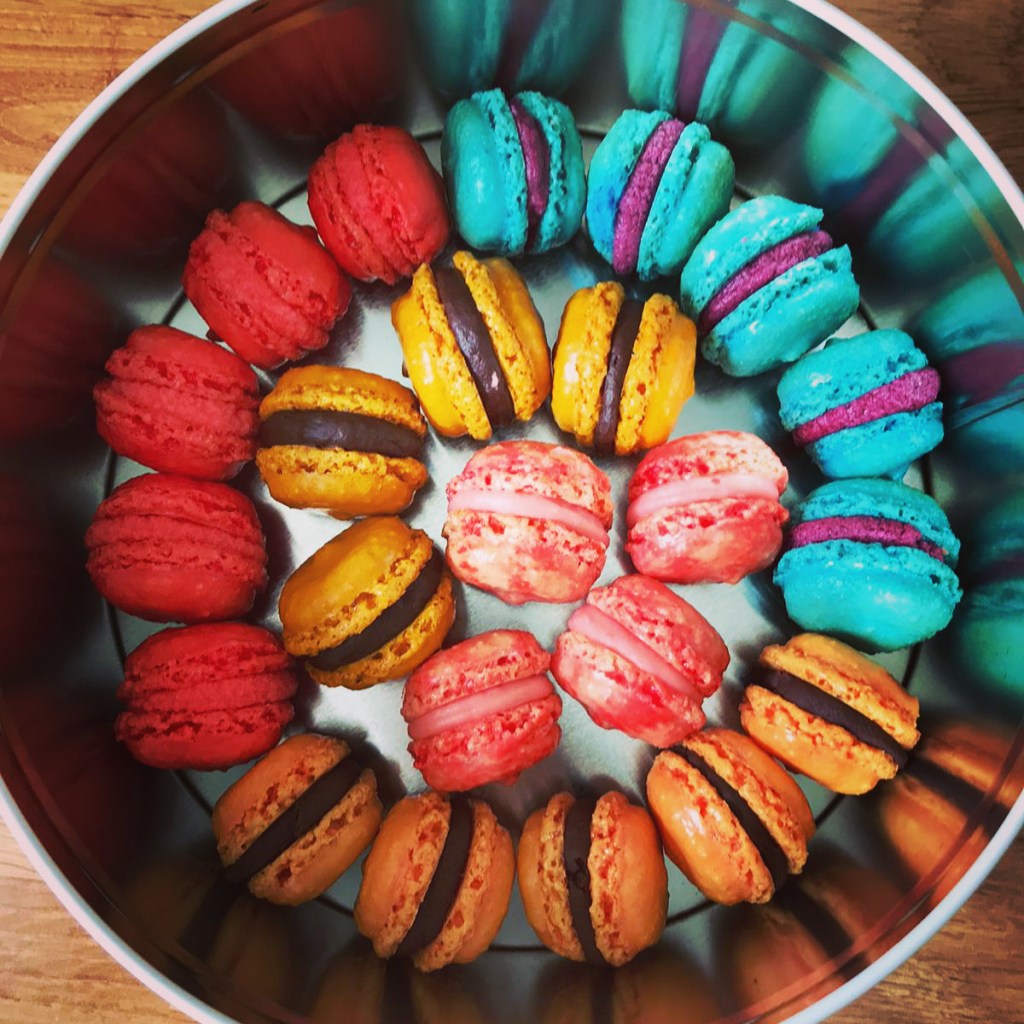
It’s generally true in life that the more effort you put into something the greater the reward, and this is definitely true of macarons; very fiddly and time consuming to make but oh so tasty! This morning I’ve been playing around with different coloured shells and different filling ideas. The five fillings in the photo are blueberry, strawberry and chocolate, and then two boozy options of strawberry with pink champagne, and chocolate with cointreau (orange).
Having had several failed attempts in a row at baking diabetic macarons, I decided to cut myself some slack and treated myself to some baking with real sugar with makes life so much easier! I made some lemon cupcakes with lemon icing to match, and banana cupcakes with chocolate icing and grated dark chocolate to decorate. I’m also a beginner when it comes to using a pipping bag and nozzle, so I had fun trying out these two different patterns with the butter cream frostings.
For taking into account when adjusting insulin doses; each cake has approximately 15g caster sugar in the sponge and 30g icing sugar in the frosting.
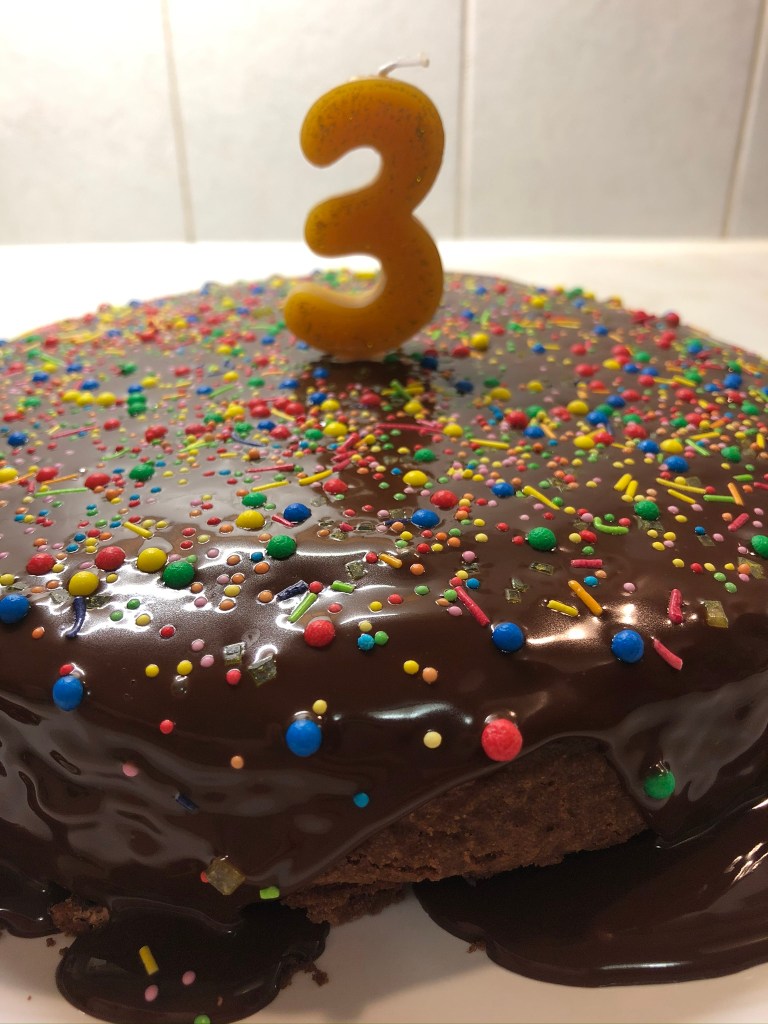
Amazingly, it was Alice’s third birthday today! And naturally, as any three year old does, she requested a chocolate cake for her birthday. So i baked her a diabetic chocolate cake, using dark chocolate chunks in my batter, and a sugar-substitute. I iced it with a silky smooth chocolate ganache, and sprinkled it with multi-coloured sprinkles (would have looked better with chocolate shavings in my opinion, but then, I’m not a three-year-old!) before leaving it to set overnight. We enjoyed it in the garden, and Alice ate it by first licking off the icing and then eating the cake…
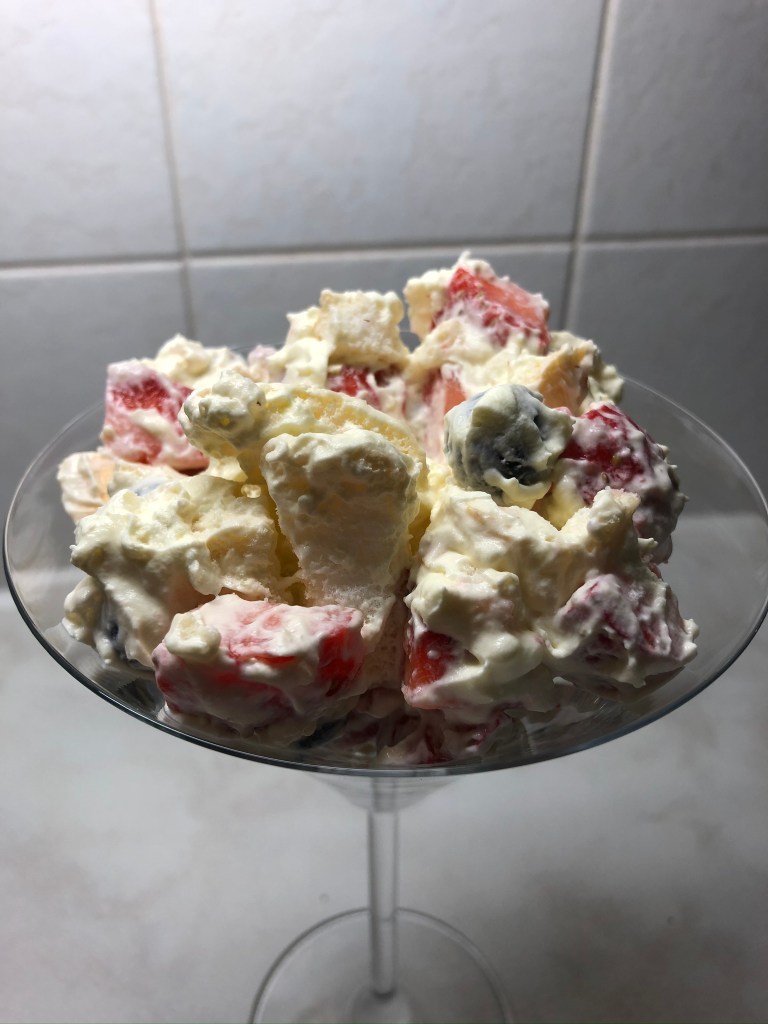
On a recent evening I served Alice a portion of my diabetic Eton Mess for pudding, and she looked at me with a completely straight face and asked “Mummy, are we eating the mess?”. Hence, in our house, “Eton mess” has since been referred to as “Eating the Mess”!
In my meringue recipe, I substitute caster sugar for a diabetic-friendly sugar-substitute with a GI (glycaemic index) of very close to zero. Compared to normal meringues, I bake my diabetic meringues at a lower temperature and for a shorter amount of time, although the meringue mantra of low-and-slow still applies. Alice loves all kinds of berries, so I’ve crumbled my meringues up and mixed them with blueberries, strawberries and whipped double cream. Delicious on a warm quarantine Spring-time evening!